Django. Social Login with django-social-auth

Logging in to websites through social networks is very convenient: you don’t have to fill out registration forms and so on. You just click the appropriate button and the site logs you in, retrieving the data it needs from the source site (the social network you’re logging in through).
In my projects, I use the cool django-social-auth library. Before that, I tried django-ulogin, but I didn’t like the uLogin service itself (my rambling notes about it). Over on Pykh, we also discussed other libraries, particularly loginza, but the reviews were bad, so I didn’t even try it. In any case, services are services, and depending on services is more of a problem (frequent outages, lousy widgets and appearance with no customization, etc.) than depending on a library that proxies requests to the actual “social networks.”
From here on, we’ll discuss only django-social-auth.
There are actually two repositories we’re interested in:
- The main one, by omab;
- And a second one, with fresh support for Russian social networks, by krvss, to which I sent fixes.
Registering with the Networks
First, we need to get keys from the social networks we want to use. The project’s GitHub page has instructions for lots of social networks, but I had trouble with this at the time, so I decided to write down the steps for some of them.
Go to https://developers.facebook.com/apps/ and click + Create New App. Enter the application name (the name of your website or project). After submitting the form, you’ll see the “App ID” and “App Secret” credentials.
Add them to your settings.py, for example:
FACEBOOK_APP_ID = '696381432507483'
FACEBOOK_API_SECRET = 'example-facebook-api-secret'
Now fill in the “App Domains” field, listing the domains separated by spaces (for example, one local domain and one production domain). Check “Website with Facebook Login” and enter the redirect URL. I redirect to the root of the production site.
Go to https://dev.twitter.com/ and enter your Twitter account’s username and password. Then go to https://dev.twitter.com/apps and click Create a new application, fill in the required fields and agree to the rules, after which you’ll receive a “Consumer key” and “Consumer secret.”
Add them to settings.py, for example:
TWITTER_CONSUMER_KEY = 'example-twitter-consumer-key'
TWITTER_CONSUMER_SECRET = 'example-twitter-consumer-secret'
By default, you’ll be given the “Read-only” access level, which is enough for login. I recommend reading The Application Permission Model.
VKontakte
Go to http://vk.com/developers.php and click Создать приложение, select “Website” as the Type, and enter the website address and domain name. You’ll receive an “Application ID” and a “Secure key.”
Add them to settings.py, for example:
VK_APP_ID = '1234567'
VKONTAKTE_APP_ID = VK_APP_ID
VK_API_SECRET = 'example-vk-api-secret'
VKONTAKTE_APP_SECRET = VK_API_SECRET
I asked on the author’s blog why the variables need to be duplicated and got an answer. Also see the backend documentation.
Google+
Go to https://code.google.com/apis/console/, click Create, enter the required information, and you’ll see the “Client ID” and “Client secret” on the API Access tab.
Add them to settings.py, for example:
GOOGLE_OAUTH2_CLIENT_ID = '123456789.apps.googleusercontent.com'
GOOGLE_OAUTH2_CLIENT_SECRET = 'p0dJSDjs-dAJsdSAdaSDadasdrt'
GitHub
Go to https://github.com/settings/applications/new and enter your GitHub account’s username and password. Enter the application name and the website addresses for “URL” and “Callback URL” (in my case, these are both the same address, the site’s root page). You’ll get a “Client ID” and “Client Secret,” which you should then add to settings.py:
GITHUB_APP_ID = 'da3bad06987041629b96'
GITHUB_API_SECRET = 'example-github-api-secret'
Now let’s move on to configuring social_auth.
Installing and Configuring django-social-auth
First, let’s install the application:
pip install django-social-auth
Now edit settings.py:
# Добавляем в AUTHENTICATION_BACKENDS нужные бекенды,
# смотрите полный список https://github.com/omab/django-social-auth/blob/master/doc/configuration.rst
AUTHENTICATION_BACKENDS = (
    'social_auth.backends.twitter.TwitterBackend',
    'social_auth.backends.facebook.FacebookBackend',
    'social_auth.backends.contrib.vk.VKOAuth2Backend',
    'social_auth.backends.google.GoogleOAuth2Backend',
    'social_auth.backends.contrib.github.GithubBackend',
    'django.contrib.auth.backends.ModelBackend',
)

# Добавляем в TEMPLATE_CONTEXT_PROCESSORS процессор "social_auth_by_name_backends"
TEMPLATE_CONTEXT_PROCESSORS = (
    'django.contrib.auth.context_processors.auth',
    'django.core.context_processors.request',
    'social_auth.context_processors.social_auth_by_name_backends',
)

# И добавляем "social_auth" в INSTALLED_APPS
INSTALLED_APPS = (
    ...
    'social_auth',
)
Add these additional social_auth settings to settings.py:
import random
# Если имя не удалось получить, то можно его сгенерировать
SOCIAL_AUTH_DEFAULT_USERNAME = lambda: random.choice(['Darth_Vader', 'Obi-Wan_Kenobi', 'R2-D2', 'C-3PO', 'Yoda'])
# Разрешаем создавать пользователей через social_auth
SOCIAL_AUTH_CREATE_USERS = True

# Перечислим pipeline, которые последовательно буду обрабатывать респонс
SOCIAL_AUTH_PIPELINE = (
    # Получает по backend и uid инстансы social_user и user
    'social_auth.backends.pipeline.social.social_auth_user',
    # Получает по user.email инстанс пользователя и заменяет собой тот, который получили выше.
    # Кстати, email выдает только Facebook и GitHub, а Vkontakte и Twitter не выдают
    'social_auth.backends.pipeline.associate.associate_by_email',
    # Пытается собрать правильный username, на основе уже имеющихся данных
    'social_auth.backends.pipeline.user.get_username',
    # Создает нового пользователя, если такого еще нет
    'social_auth.backends.pipeline.user.create_user',
    # Пытается связать аккаунты
    'social_auth.backends.pipeline.social.associate_user',
    # Получает и обновляет social_user.extra_data
    'social_auth.backends.pipeline.social.load_extra_data',
    # Обновляет инстанс user дополнительными данными с бекенда
    'social_auth.backends.pipeline.user.update_user_details'
)
Include the routes in urls.py:
urlpatterns = patterns('',
    ...
    url(r'', include('social_auth.urls')),
)
Database synchronization:
./manage.py syncdb
./manage.py migrate social_auth
You can find the documentation here:
A Widget for Displaying Buttons
This is just an inclusion template tag that displays links as little buttons with social network logos. It looks something like this:
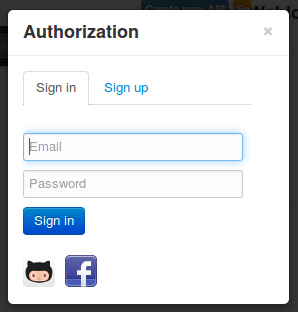
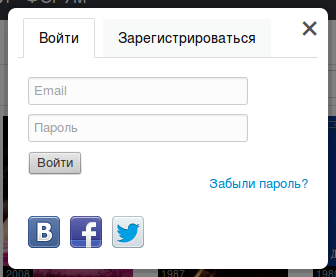
I didn’t publish the widget itself on PyPI, since I don’t think that’s important. You should simply copy the source from here: https://github.com/adw0rd/django-social-auth-widget
Then add the following list to settings.py:
SOCIAL_AUTH_PROVIDERS = [
    {'id': p[0], 'name': p[1], 'position': {'width': p[2][0], 'height': p[2][1], }}
    for p in (
        ('github', u'Login via GitHub', (0, -70)),
        ('facebook', u'Login via Facebook', (0, 0)),
        ('twitter', u'Login via Twitter', (0, -35)),
    )
]
Use it like this in the template containing your login form:
{% load social_auth_widget %}

<form action="" method="post">
    <input name="username" />
    <input name="password" />
    <input type="submit" value="Sign in" />
    {% social_auth_widget %}
</form>
Updating Avatars on Login
The article Django Social Auth: now with images has an example of how to update a user’s avatar using signals. In my opinion, the code is only useful as an example.
Comments are closed. Read the original discussion in Russian →